Over the last month I have migrated my home server from a Gen 8 HP Microserver to a Lenovo P500 workstation. There are many reasons for my migration the two biggest were that I was being constrained by the amount of RAM the Microserver could take (16Gb vs 512Gb), the processor was also becoming a bit of a bottle neck.
The second was that in my professional life I have moved from VMWare ESXi to Proxmox and my home lab was the only ESXi server that I was left managing, it also meant I wasn’t reflecting my professional install base so making it hard to test things.
Migrations are horrible, no matter how much planning you do, they take time and suck! No matter how many trials and tests you do there will always be something.
I used an old desktop PC with a 500Gb SATA drive and a 240Gb SSD to migrate all servers other than the Windows server (not enough space or grunt).
Although exceptionally boring and probably of no interest to anyone this was my migration plan..
- Shutdown new host
- NIC in new host
- Check Second Network Card
- Restore firewall
- Copy all Proxmox machines from test proxmox host
- —–
- Migration
- Copy latest backup
- Run Full backup c:\backups\backup.bat
- Check USB disk on another PC
- Close OneDrive
- Restart PC
- Check OneDrive is stopped
- Shutdown VM
- Convert System Disk
- Check Proxmox Boot
- —–
- Move 2Tb disks to think station
- Create new ZFS 2Tb for File Server
- Boot File Server
- Add 1.8Tb disk
- Setup OneDrive if needed
20/02/2020 20:12 <JUNCTION> data [d:\data]
17/09/2020 08:48 <JUNCTION> media [D:\media]
17/09/2020 09:07 <JUNCTION> server backups [D:\backups]
- Start OneDrive
- Undisable Start with Windows OneDrive
- Check shares
- Remove “to watch” from backups
- USB pass through
- Setup Proxmox Backups (Exclude File Server d drive)
- —–
- Remove SSDs from Microserver and check
- Rebuild Test Proxmox as Hobby PC with 240Gb SSD
- —–
- Take old Hobby PC
- Check 120Gb SSDs
- —–
- 2FA for SSH and Proxmox on New Host
- Add New Host to Nagios
This was all in a text file which I constantly updated and changed during the actual migration. It went well and there were only a couple of hiccups. The testing had paid off.
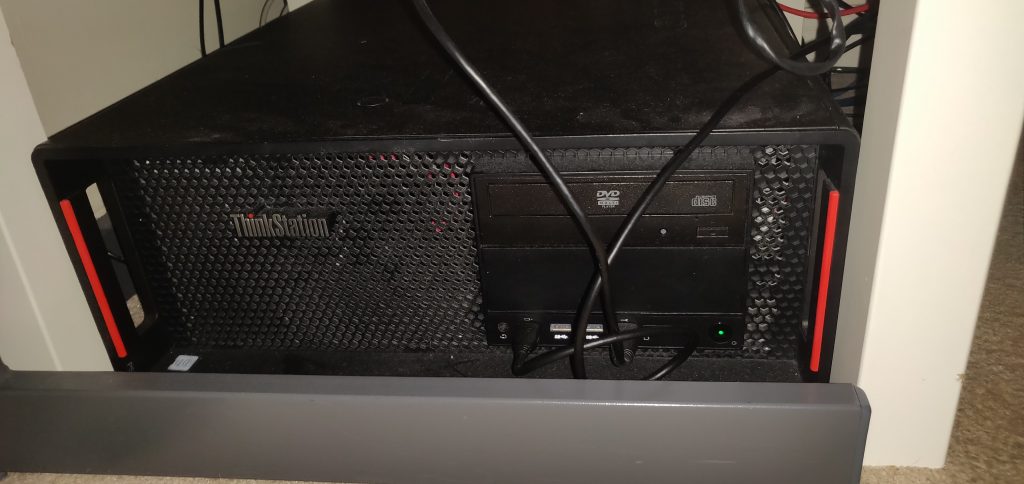
Hopper – New Host
Running proxmox with a number of Windows, Linux and BSD VMs.
- Intel(R) Xeon(R) CPU E5-2609 v3 @ 1.90GHz (1 Socket)
- 48Gb RAM
- 2x 480Gb NAS SSD (ZFS), 2x 3Tb NAS SATA (ZFS), 1x 2Tb SATA (Backups)
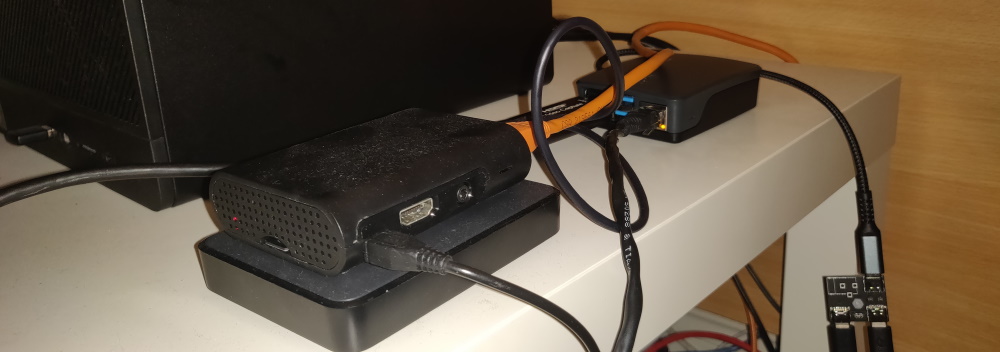
The two USB cables – One going to an external HDD for file level backups, the second goes to the Pi KVM (for keyboard and mouse control)
The Pis
Tron – Pi 2 3+
4Tb USB Drive
Backup Pi (Rsync and rclone)
IP KVM – Pi 4 (2Gb)
Power/Data Splitter at the back
USB to HDMI Capture Card
Both are cabled into the network. The Pi 2 only has 100Mbps network, so it’s likely to need replacing soon to keep up with my internet, but for now it works! The Pi 3+ has “Gb network” however due to it using the same USB bus it can only realistically achieve 300Mbps.
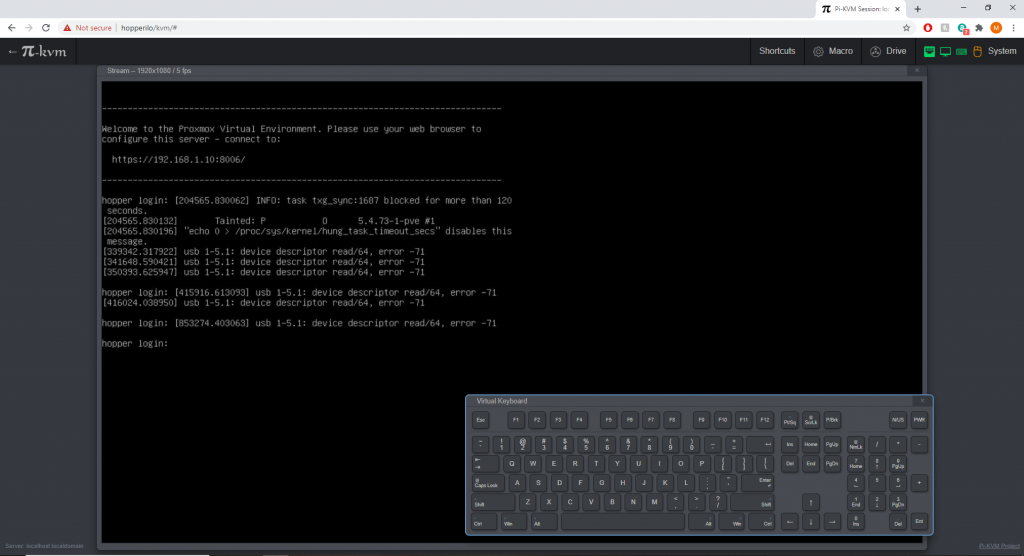
Pi KVM
This part of the project nearly got it’s own page… However, I don’t have much to say! One of the biggest drawbacks of migrating to the workstation was that I lost iLO (intelligent lights out / IPMI). I use iLO rarely but it is an incredibly useful when you do need it!
I was looking at aftermarket cards and IP based KVMs and they are expensive! I couldn’t justify the cost for a single host or the amount of time I use it.
Then I came across Pi KVM, it looked hugely daunting until I started reading about it. For simple KVM features (and a host of other features) it was incredibly easy to build a Pi 4 KVM (you can use other Pi generations but you will need to do more work). Just one cable and an HDMI capture card and it just works!
They are also developing their own Pi HAT with all the features (including power management (i.e. remote reboot)), I’ll probably buy one when they are released as I can think of a number of locations where a sub £100 KVM would be a life saver, especially with the remote reboot abilities.
Pi KVM can be found here: https://www.pikvm.org/
Another Pi KVM project can be found here: https://tinypilotkvm.com/
Bits I bought to make my Pi KVM
- 2Gb Pi 4 – Pi Hut
- USB to HDMI – Amazon UK
- Power Splitter (I did run it off the host to start, but decided this introduced a dependence I didn’t want) – Tindie UK Based Seller
That was it! I had a case, power supply and SD card knocking about any way… When the hat is released I will need to think about a different case.