Proxmox P2V Migration
Windows Physical Server to Proxmox
I am fortunate enough that even with my main job, I am allowed to take side hustles. These are normally technical in nature, something that my primary role doesn’t involve so much any more, and I only take the ones that give me an opportunity to learn.
Just before Christmas a friend got in touch, one of their customers was being charged a huge amount for colocation of a single server (as it turns out protected by a woefully under powered firewall). I hadn’t done a physical to virtual migration (P2V) in about 10 years so I quoted for the job and we won the business.
As part of the quote we suggested a trial migration, as the customer was wary of virtualisation, their current provider had actively discouraged it. It was time to find a P2V solution… In the past I have used the vmware convertor tool, there were two issues with this, firstly it hasn’t been updated in years (and has now been pulled) and secondly I wanted a proxmox compatible disk at the end.
Looking for new tool proved harder than I expected, until I stumbled upon Disk2vhd, a tool provided by Microsoft’s sysinternals “brand”. This tool will create a VHDX (or VHD) file for a physical drive and yes you can save it to the same drive!
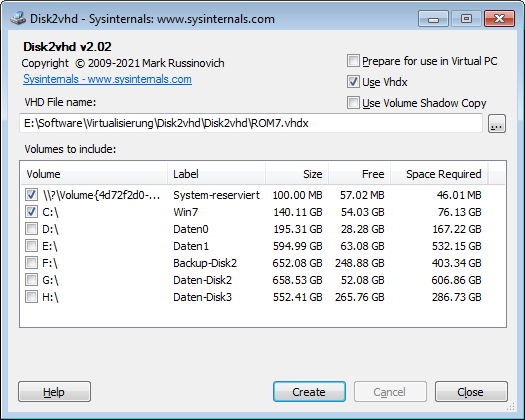
Disk2vhd GUI
As you can see the GUI for Disk2vhd is incredibly easy to use. I learnt a couple of things, the first is to make sure you create the image at a disk level not a partition level else you end up with a confusing set of VHDs. Also don’t create one VHD and then disk2VHD that partition (because the image gets huge). Once you have the VHDx images copy them to your proxmox server and convert them to qcow2
qemu-img convert -O qcow2 /var/lib/vz/harddrives/XXXX.vhdx /var/lib/vz/images/xxx/vm-xxx-disk-X.qcow2That’s it, Disk2vhd is such a great tool and it’s available for free and appears to be updated! Now you have the qcow images you can add them to your target VM. You will need to do a little prework to the VM before you can get the best performance. What I did:
- Create an empty 1Gb disk with the virtio controller (this forces the virtio driver install) - Add the converted disk(s) to the VM as IDE
- Boot the server off the IDE disks
- Install the latest virtio drivers
- Change the IDE disks to virtio and remove the empty disk
- Boot and check The live migration has been booked and I will update this post once this is complete with any further information.